D-3.5 Installing Storm Drainage Systems
The storm drainage system installation has many of the same installation considerations as a sanitary drainage system; however, the roof penetrations will be connected to drains as opposed to vent terminations.
Safety
Construction sites are among the most dangerous and risky working environments. The installer must observe the Occupational Health and Safety (OHS) Regulation during all phases of a storm drainage system installation.
Pre-operational and safety checks are to be carried out on tools, equipment, and machinery according to manufacturer’s specifications and site safety procedures. OHS hazards are identified, risks assessed, and risk controls implemented. The installation of storm drainage systems requires a worker to be aware when working at heights, in excavations, and in confined spaces, so always take appropriate safety precautions. The worker must also select, use, and maintain suitable personal protective equipment (PPE).
Tools and Equipment
Tools and equipment are selected according to the piping material used, the drainage system design requirements, and work site procedures.
Determining Slopes
The minimum slopes are dictated by the NPC depending on the size and function of the pipe. All drainage pipes must be installed with a minimum slope of 1:50. In some situations, the slope of the building drain may be reduced to 1:100 if it is at least 100 mm (4 in.) in size. This reduction in slope will allow for less fall over a given length, which may be needed to match the invert of a previously installed municipal drainage connection.
Installing Components
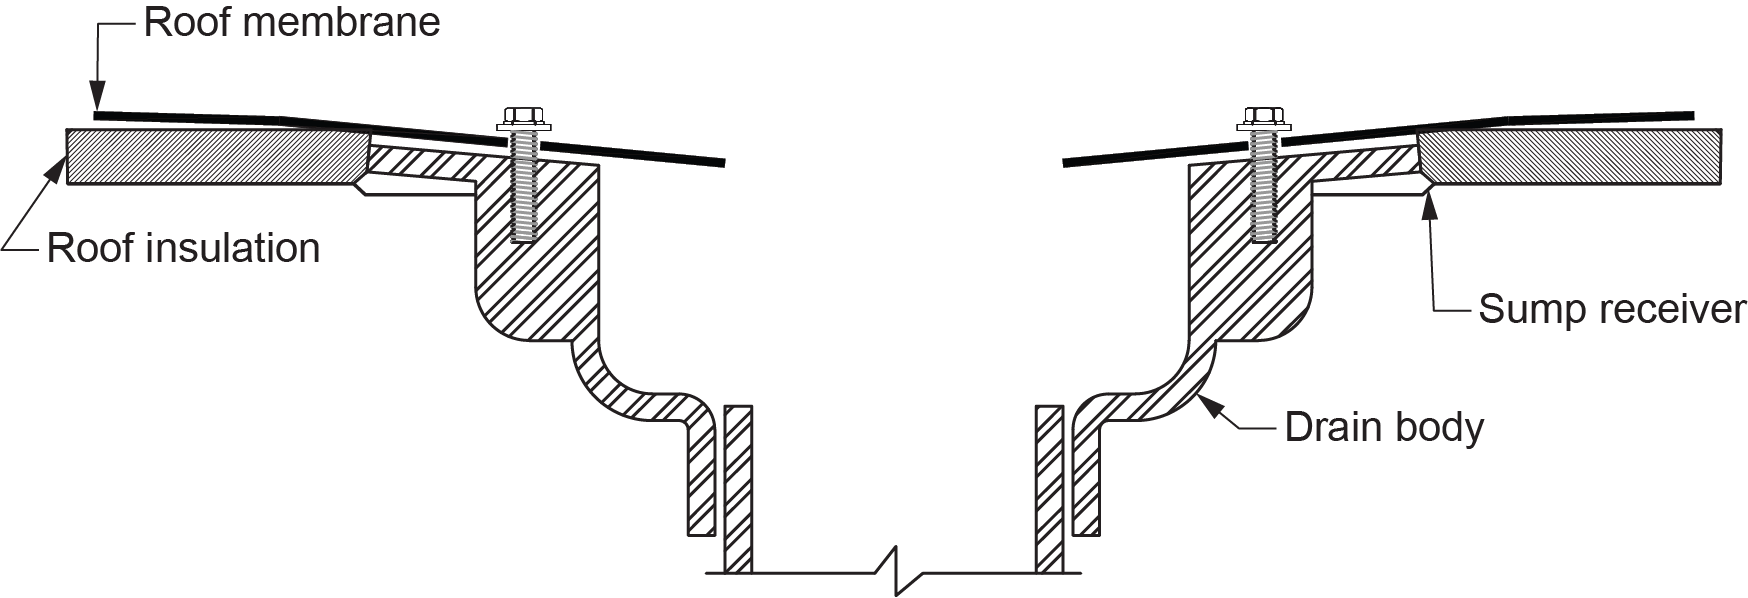
Installing and sealing a roof drain penetration where a waterproof roof membrane material is utilized requires knowledge of how the assembly is installed. The drain body is placed in the roof opening and held in place by an underdeck clamp. If a sump receiver is specified, it should be placed so that it is flush with the supporting edges of the drain body. The waterproof membrane will be installed over the sump receiver and drain body (Figure 1).
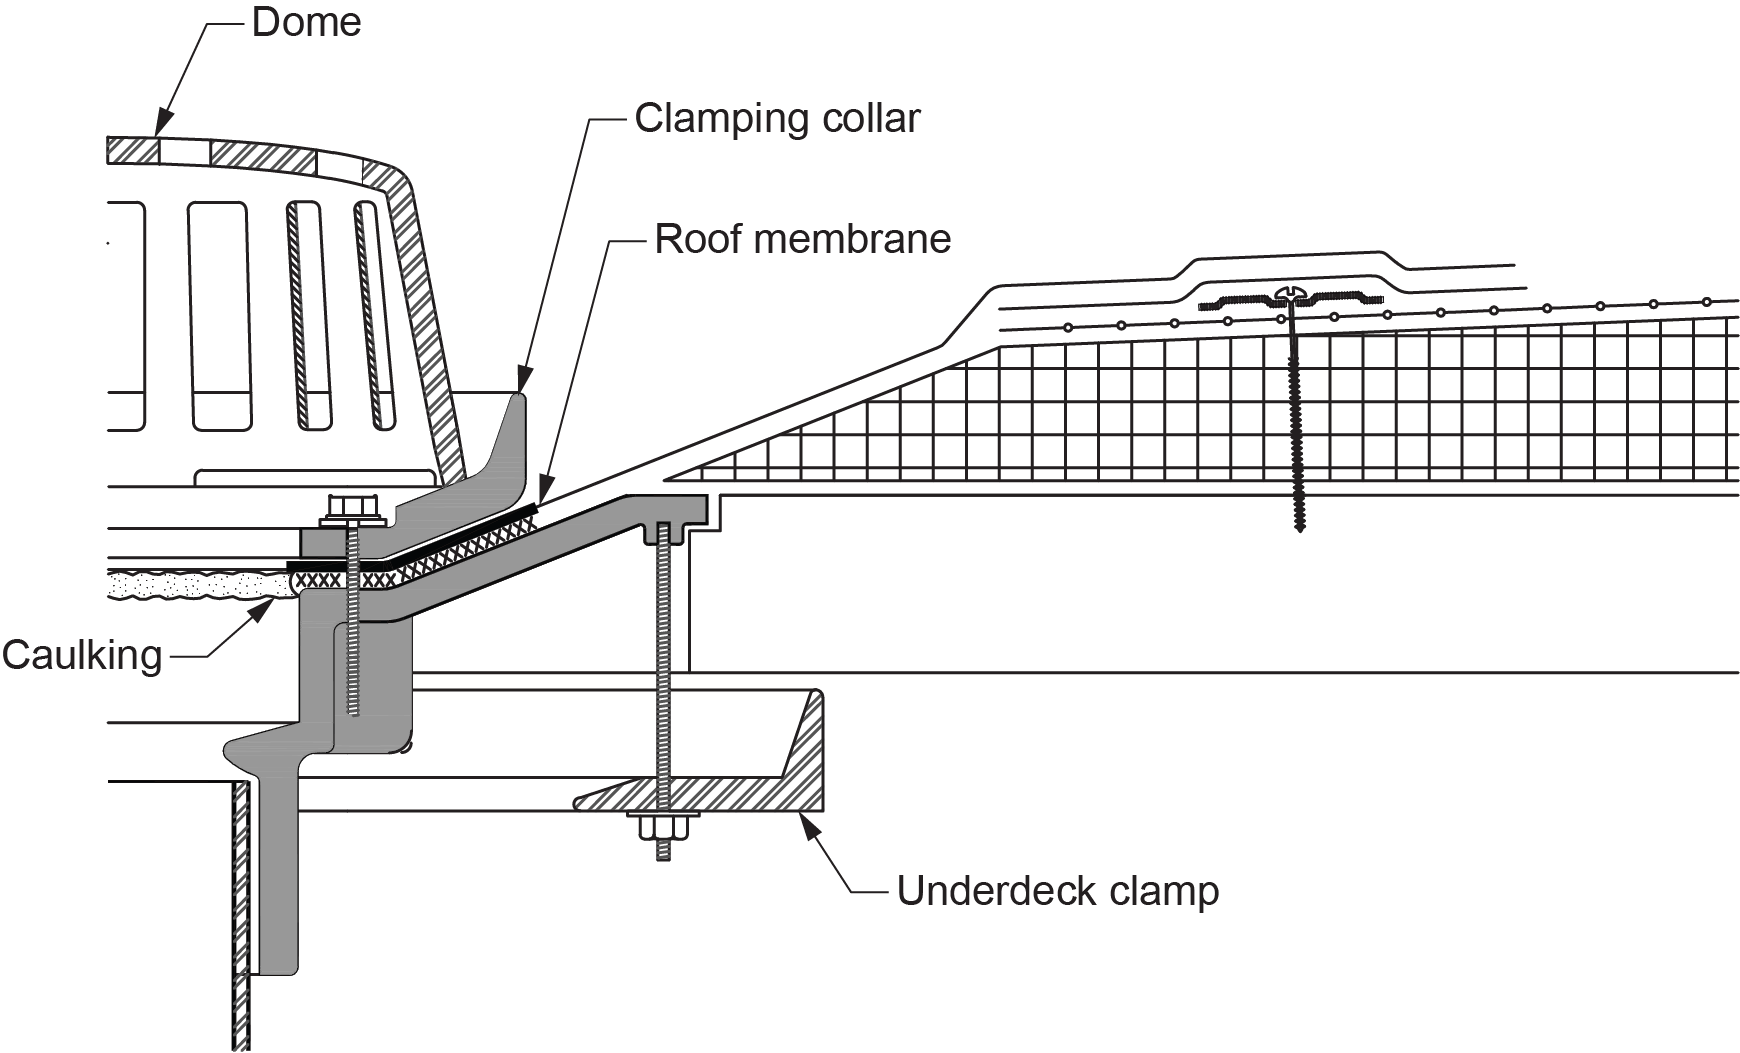
The roof drain will be supplied with a clamping collar bolted through the drain body to clamp the roof membrane to the body, making a watertight seal. The dome is then placed into the clamping collar and twist-locked into retaining clips on the clamping collar (Figure 2).
Most commercial job sites will specify that a roofing contractor install the roof drain. The plumbing contractor’s responsibility then is to supply and locate the drain. Always refer to the specific manufacturer’s installation instructions when installing storm drainage components to ensure weather-tightness at the building penetrations.
 Self-Test D-3.5: Installing Storm Drainage Systems
Complete Self-Test D-3.5 and check your answers.
If you are using a printed copy, please find Self-Test D-3.5 and Answer Key at the end of this section. If you prefer, you can scan the QR code with your digital device to go directly to the interactive Self-Test.

References
Skilled Trades BC. (2021). Book 2: Install fixtures and appliances, install sanitary and storm drainage systems. Plumber apprenticeship program level 2 book 2 (Harmonized). Crown Publications: King’s Printer for British Columbia.
Trades Training BC. (2021). D-3: Install storm drainage systems. In: Plumber Apprenticeship Program: Level 2. Industry Training Authority, BC.
Media Attributions
All figures are used with permission from Skilled Trades BC (2021) unless otherwise noted.
A set of rules and guidelines designed to protect workers' health and safety during construction and other work activities. These regulations must be followed to minimize risks and hazards on job sites. (Section D-3.5)
The smallest allowable incline for drainage pipes, typically 1:50 as per regulations like the NPC. In some cases, the slope may be reduced to 1:100 for building drains at least 100 mm (4 in.) in size to match other connected drainage systems. (Section D-3.5)
A metal ring used to hold parts together, like a roof drain and the waterproof membrane, to make sure everything stays tightly in place and doesn't let water leak through. (Figure 2, Section D-3.5)
